How to build Tracking card AR using Swift


In this blog, I will be explaining how to build the AR application of tracking a card and display any video clip on that and with only 80 lines of code.
For this tutorial, you should be familiar with Swift so that it can be easy for you to understand.
Let's make an app
Step 1:
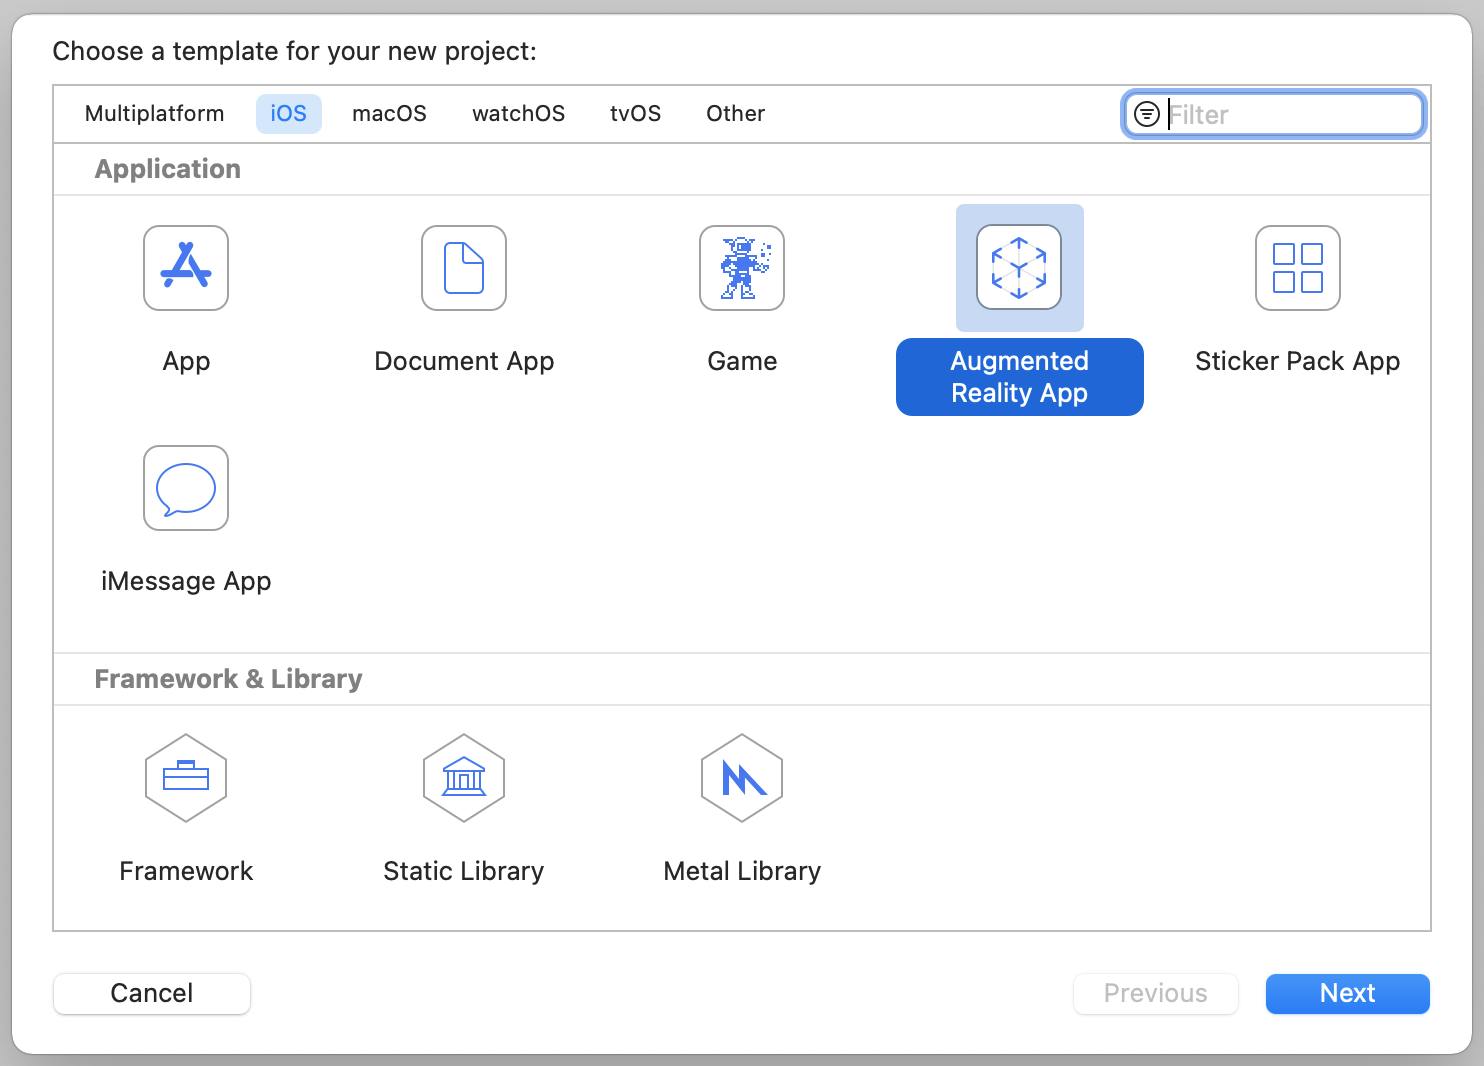
Open Xcode and create a new project and choose a template for the Augmented Reality App.
Step 2:
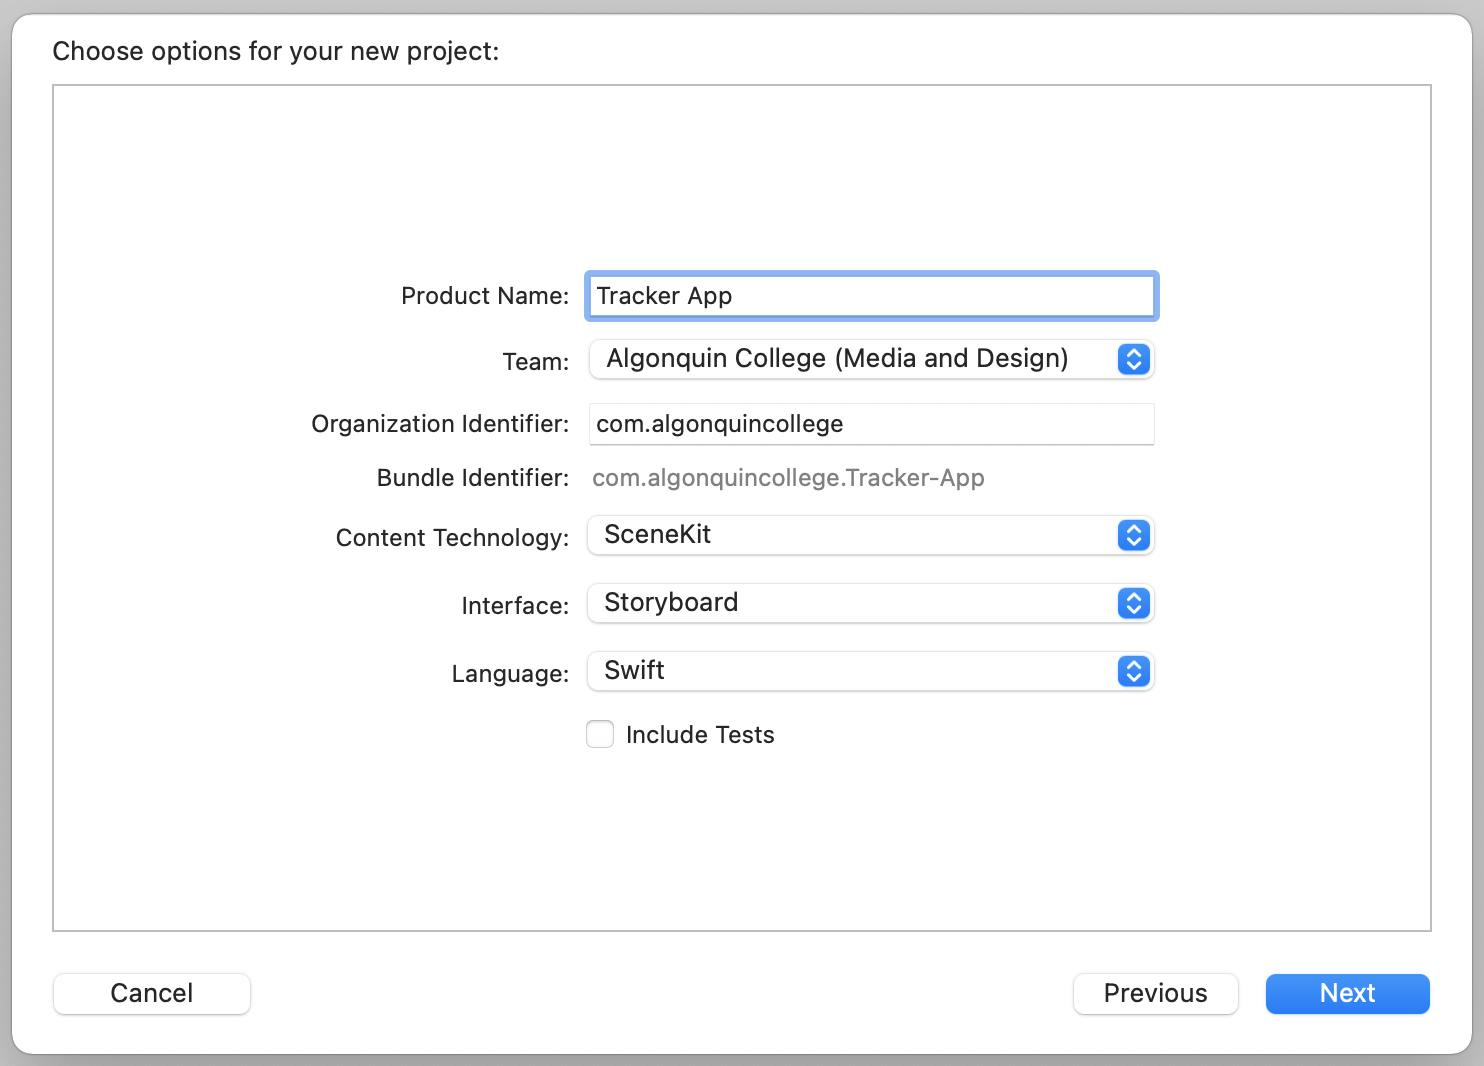
Click next and then give your product a name and in Content Technology there will reality kit selected instead of that change if to the scene Kit.
Step 3:
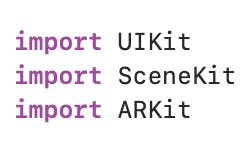
The project will come with three imports Uikit is a basic kit that is used to create a User interface for your ios app. Scenekit is used to create 3D content for the apps ARkit is used to integrate camera and motion features to produce augmented reality.
##Step 4: There will be a viewController class with UIViewController and ARSCNViewDelegate which will be delegate protocol used to provide scene kit content to ARAnchor objects for AR session

##Step 5:
Create an outlet for the instance for the view of class ARSCNView! to use that in later in viewDidLoad function.

##Step 6:
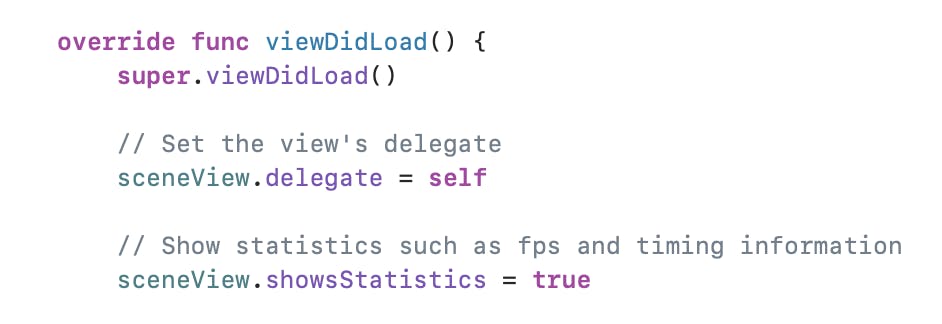
In viewDidLoad function set the view's delegate to self. And set the statistics to that outlet to true in order to see items like fps and timing information.
##Step 7: Create a new scene and save it in a folder with an extension of '.scnassets' and store that value in the variable.


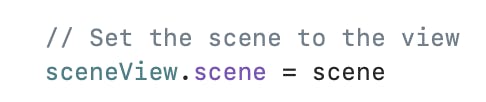
##Step 8: Set the scene to the view.
##Step 9: In viewWillAppear function create an instance of the class ARImageTrackingConfiguration and create other variable for the reference image which we already stored in AR resources to display video onto that image


##Step 10:
Now put that tracking image equals to the resources image and then run the sceneView session

##Step 11:
In viewWillDissappear function pause that scene View run.

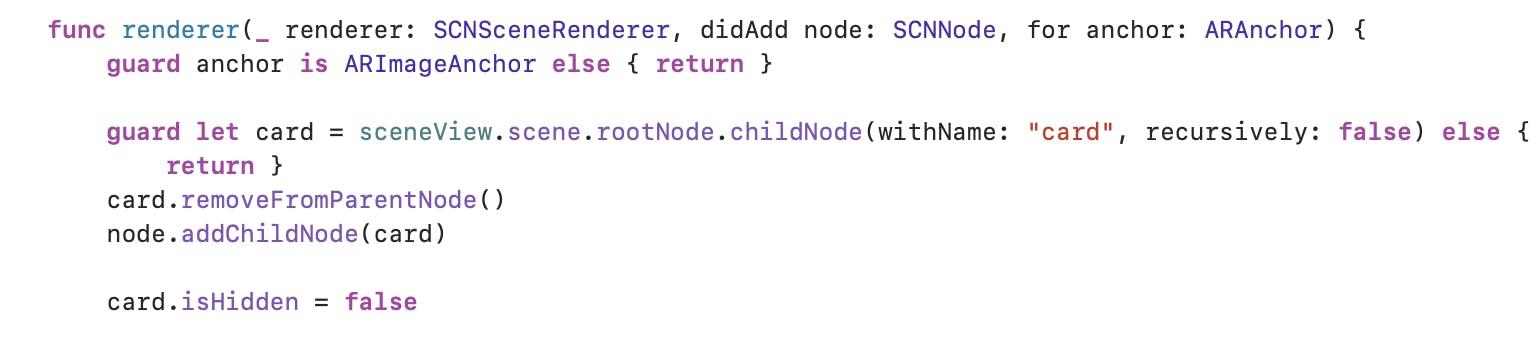
##Step 12: In the renderer function, create and configure the nodes for anchors to the view's session. First, create a guard statement for the child node of sceneView with the name of the .scn file and remove that from the parentNode. Now addChildNode to the node with the parameter of the guard statement variable and make it visible.
##Step13: Now create a variable to store the location of the video which we want to display on the card and create one instance of the AVPlayer class and in URL put that variable in which location of the video is kept.
##Step 14: Create an object of SKScene and give its size values and name the variable to videoScene
##Step 15: Create an object of SKVideoNode and store that location url as parameter.
##Step 16: Configure the position of the videoNode object and then assign it to object of SKScene. Now change its scale and play it.
##Step 17: Now add the childNode of videoScene as object of SKVideoNode

##Step 18: Add a childnode to card with video and recursively true and put that in a guard statement. The guard statement geometry's diffuse content must be equal to object of SKScene to represent the video onto the card.

And that is all. Hopefully you will be able to create that tracker by yourself. Thankyou for reading this blog